Open the Dakota Labs activity in your Moodle course, sign in, then pick an existing Dakota class or let Dakota create one. Each Moodle course connects to one Dakota class.
Before you start
- Your Moodle administrator has registered and activated Dakota Labs.
- Your Dakota account uses the same email as your Moodle account, and you’re an instructor in your organization on Dakota.
- You can edit your Moodle course.
Steps
-
On your Moodle course page, look for an activity called Dakota Labs. If it’s there, skip to step 3.
-
If it isn’t, add one:
- Turn Edit mode on.
- In the section where it belongs, choose +, then Activity or resource.
- Choose the Dakota Labs tile (your administrator may have renamed it), then Add if Moodle shows it.
- Enter an Activity name, such as Dakota Labs. Don’t use Select content here.
- Choose Save and display.
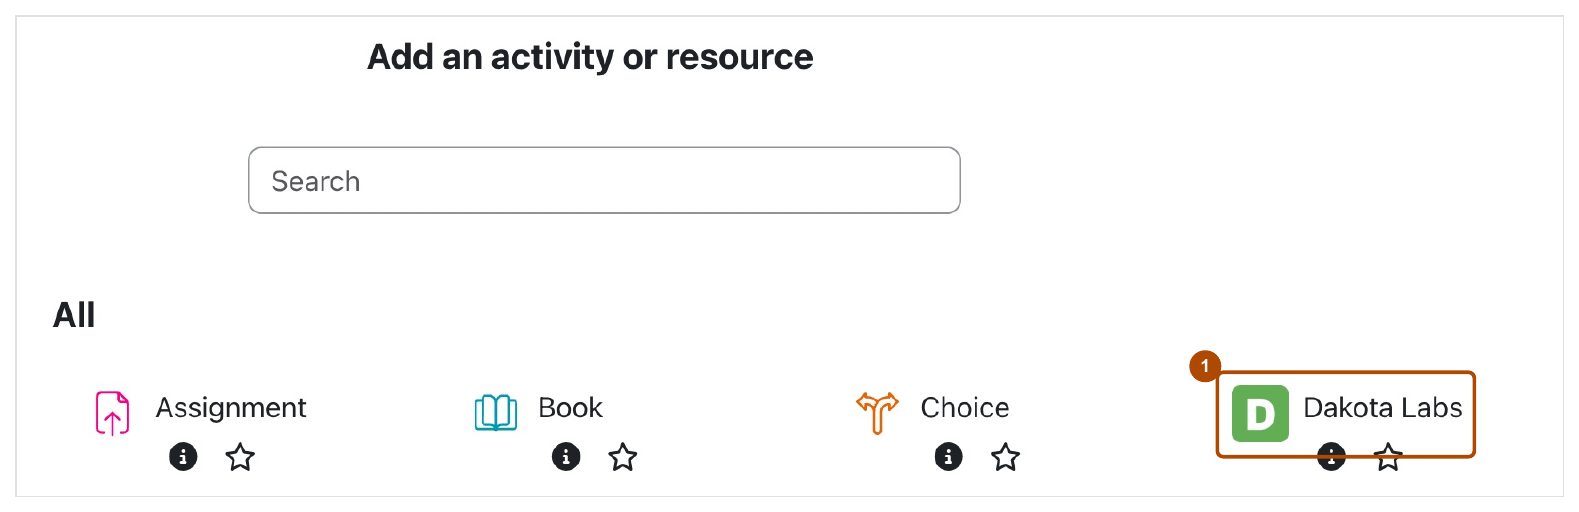
Choose the Dakota Labs tile (1). Your administrator may have renamed it. -
Open the activity. Choose Open in new window if Moodle shows it. If you see Continue to Dakota, choose Open Dakota.
-
Sign in with the Dakota account that matches your Moodle email.
-
If you see Choose your organisation, pick the one this course belongs to and choose Use this organisation. (You only see this if you belong to more than one.)
-
On Connect a Dakota class, either:
- search for your class, select it and choose Use this class, or
- choose I don’t have a class yet. Dakota names the new class after your Moodle course.
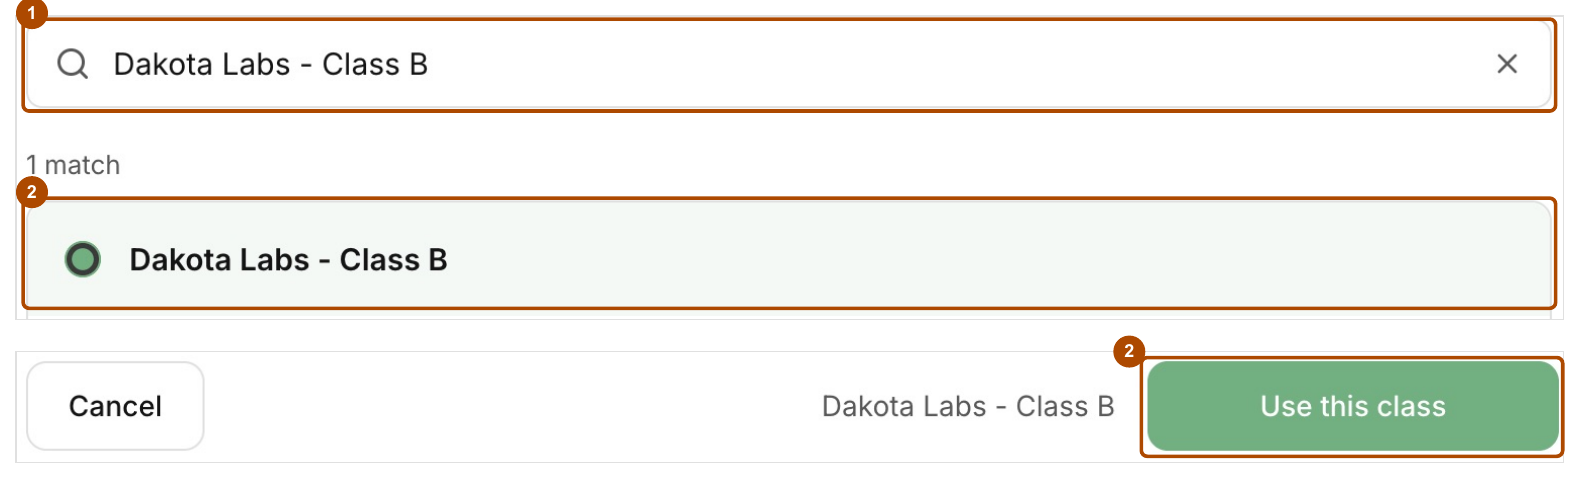
Already have a class? Search for it (1), select it and choose Use this class (2). 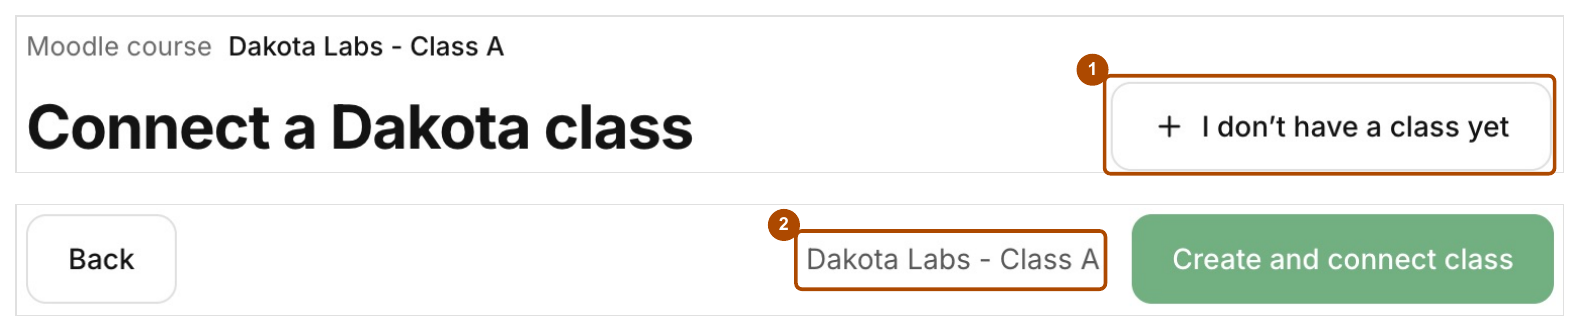
No class yet? Choose I don't have a class yet (1). Dakota names the new class after your Moodle course (2). -
Under Grade sync, choose On or Off. It starts Off. See How does grade sync work?
-
Choose Connect class (or Create and connect class for a new one).
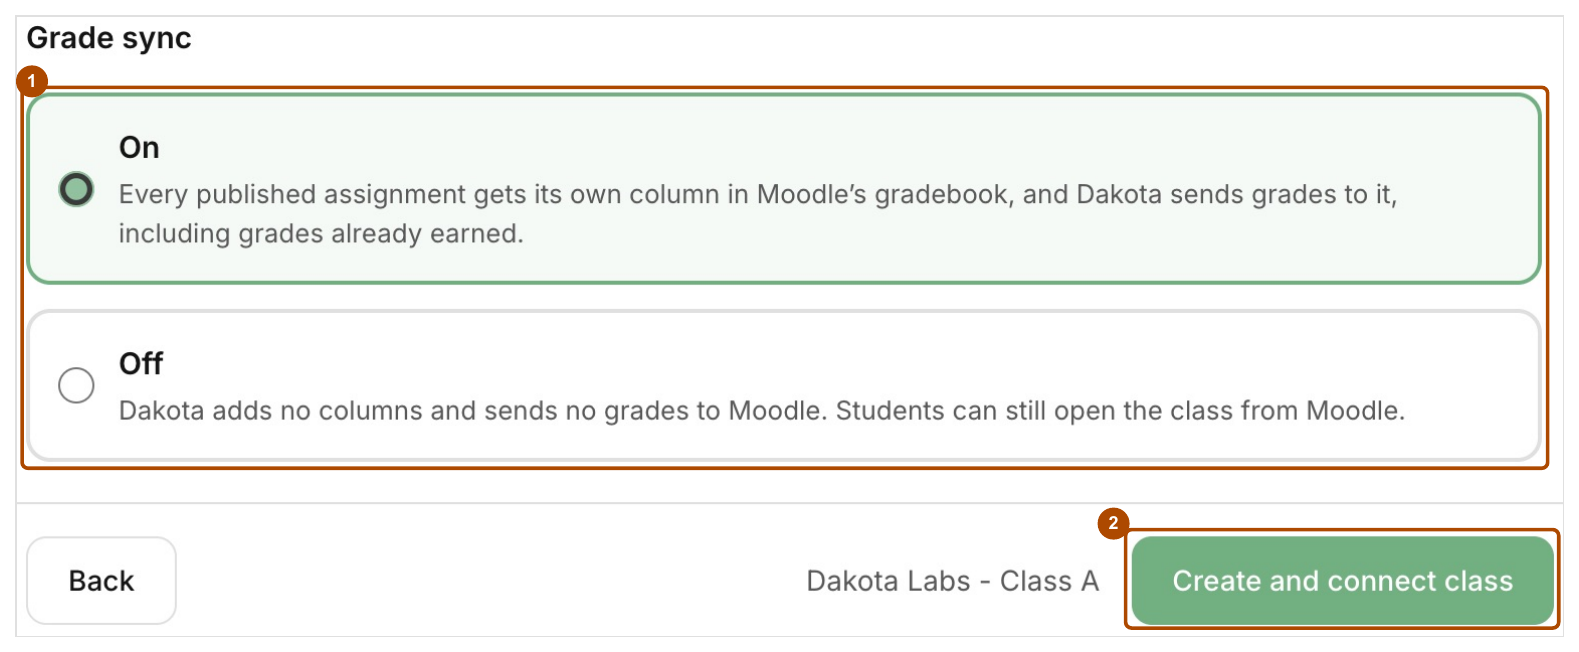
Choose On or Off under Grade sync (1), then Create and connect class (2).
What to do next
- Publish at least one assignment: see How do I create and publish an assignment?
- Add your students by their Moodle email: see How do I add students to my class? Being enrolled in Moodle doesn’t add a student to your Dakota class.
Common problems
- Dakota Labs isn’t in the activity chooser. Ask your Moodle administrator to show it in the activity chooser.
- Your class isn’t in the list. A class already connected to another Moodle course can’t be picked again.
- Dakota won’t let you in. Check your Dakota account uses your Moodle email and that you’re an instructor in an organization connected to your Moodle site.
- Your browser blocks the window. Allow pop-ups for your Moodle site, then open the activity again.
- You copied a Moodle course. Open the copy’s Dakota Labs activity and check which class it’s connected to before students use it.
- You connected the wrong class. In the Dakota class, open Settings, find Moodle course connection and choose Disconnect course. Then open the activity again.