Open Classes in the sidebar, choose Create class, enter a class name and choose Create. A class holds your students, assignments and progress in one place, and you can rename, archive or delete it at any time.
Steps
-
In the sidebar under Manage, choose Classes.
-
Choose Create class. If your organization has no classes yet, you’ll see Create your first class with the same button.
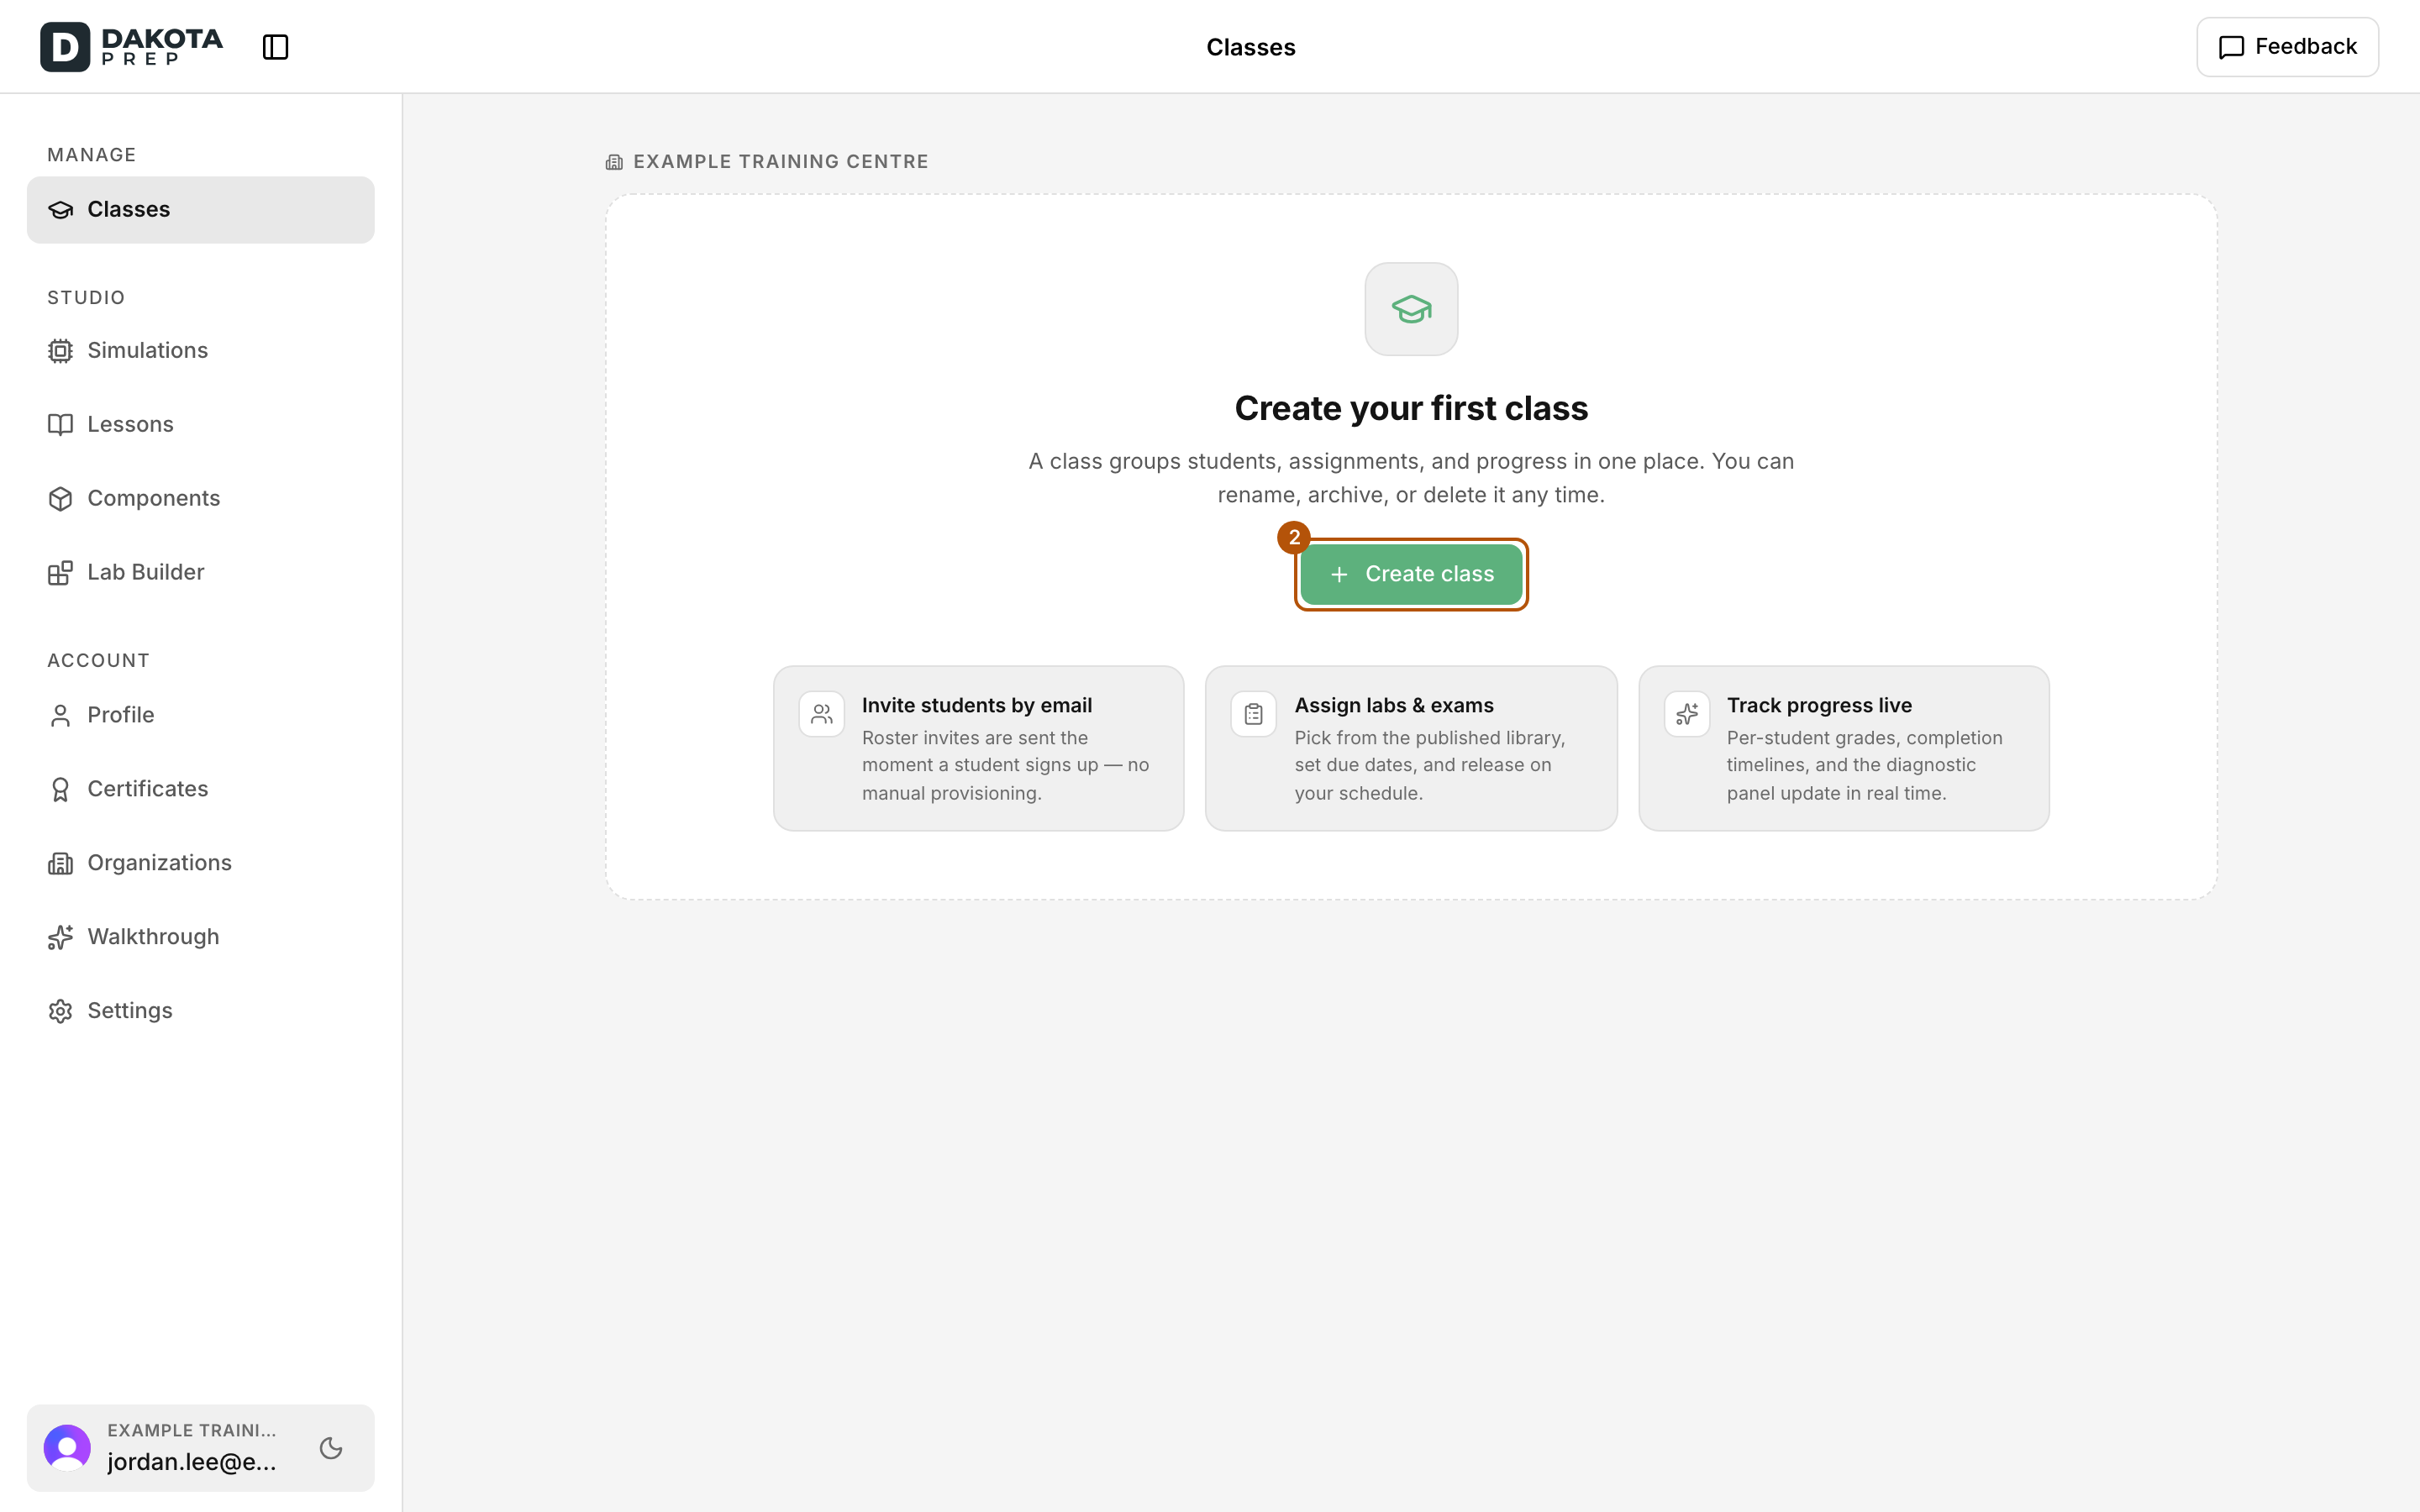
Open Classes in the sidebar, then choose Create class. -
In the Create Class window, fill in:
- Class Name (required), for example “Class A”.
- Term dates (optional): a Starts and Ends date. These are for planning only. They don’t limit publish dates, due dates or extensions. If you fill in one date, fill in both.
- Instructors (optional): add other instructors from your organization. Their names are shown to students and on your Classes list. If you add more than one, the first is the primary instructor.
-
Choose Create.
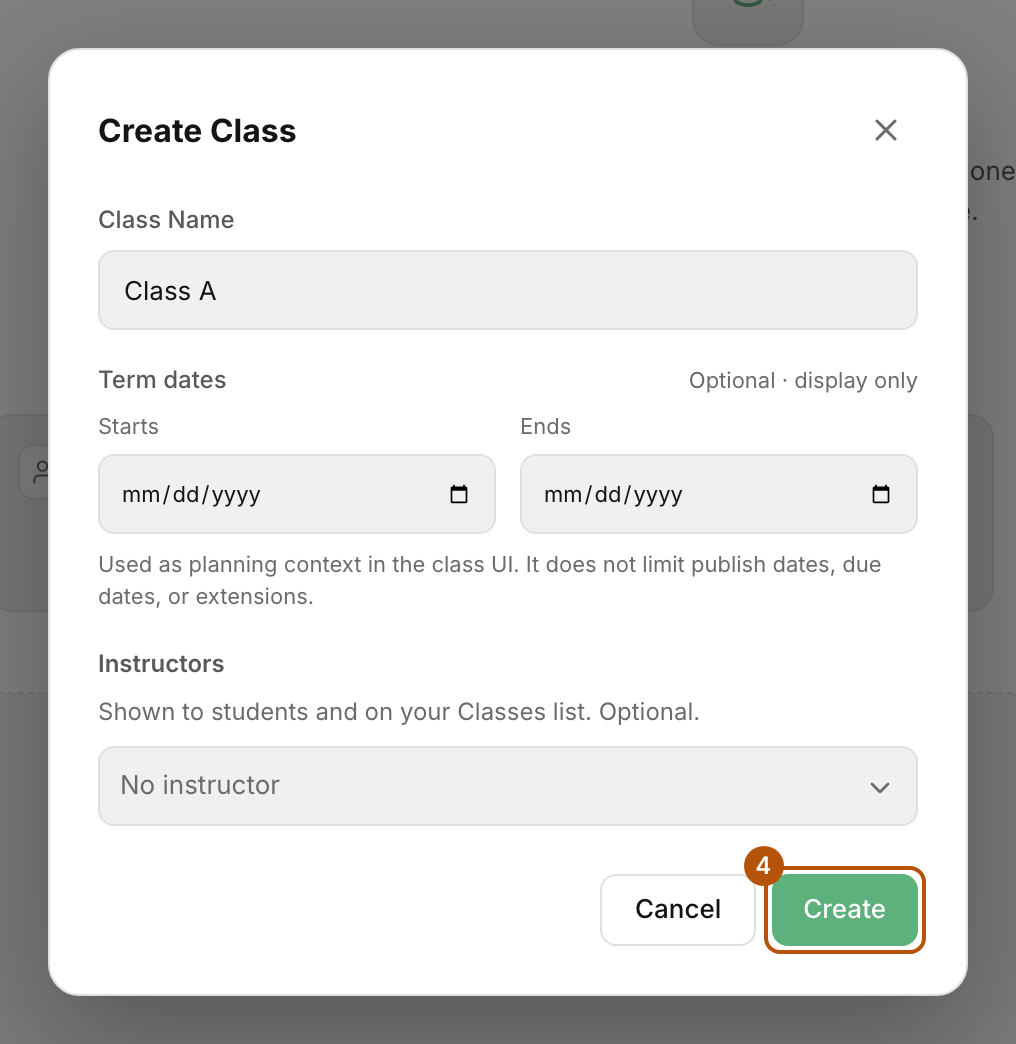
Enter a class name, add term dates or other instructors if you want, then choose Create.
Check: Dakota opens your new class on its Assignments tab, and the class appears on your Classes list.
Common problems
- Create is greyed out. Enter a class name. If you entered term dates, enter both, and make sure the end date is after the start date.
- “Term end must be after term start.” Pick an Ends date later than Starts, or clear both dates.
- I can’t find another instructor to add. They must belong to your organization first. Ask your organization’s manager.